There's nothing quite like the thrill of sending an arrow, crafted by your own hands, straight to the target. Fletching practice connects you to centuries of tradition while giving you a hands-on way to boost your skills. Whether you want to fine-tune your arrows for better arrow flight or simply enjoy the art of creation, making your own arrows is a fun and practical skill that every archer can appreciate.
Getting Started: Mastering the Craft of Fletching
Fletching is where precision engineering meets your own creative touch. Those small vanes or feathers you add to the back of an arrow may seem simple, but they play a key role in keeping your shot on target. At OneX Archery, we believe that knowing every little detail about your gear-from quality stabilizer weights to your very own custom-fletched arrows-can transform your shooting experience.
Why Make Your Own Arrows? The Perks of DIY Fletching
Taking charge of making your arrows comes with rewards that go beyond the joy of craftsmanship. You get to design arrows that match your shooting style, bow setup, and intended use. Whether you're into target practice, 3D archery, or hunting, DIY fletching lets you adjust for distance, speed, and accuracy. It also helps you save money because you can fix a damaged arrow instead of buying a new one every time. Most of all, the hands-on process teaches you how your equipment works, helping you make smarter choices for your whole archery setup.
Getting Your Tools and Gear Ready
Your arrow-making journey starts with gathering the right tools and materials. Even if the steps are simple, using quality components makes a real difference between arrows that fly true and those that wander off course. A well-prepared workspace and the right gear set you up for success.
Must-Have Tools: Fletching Jig, Adhesives, and More
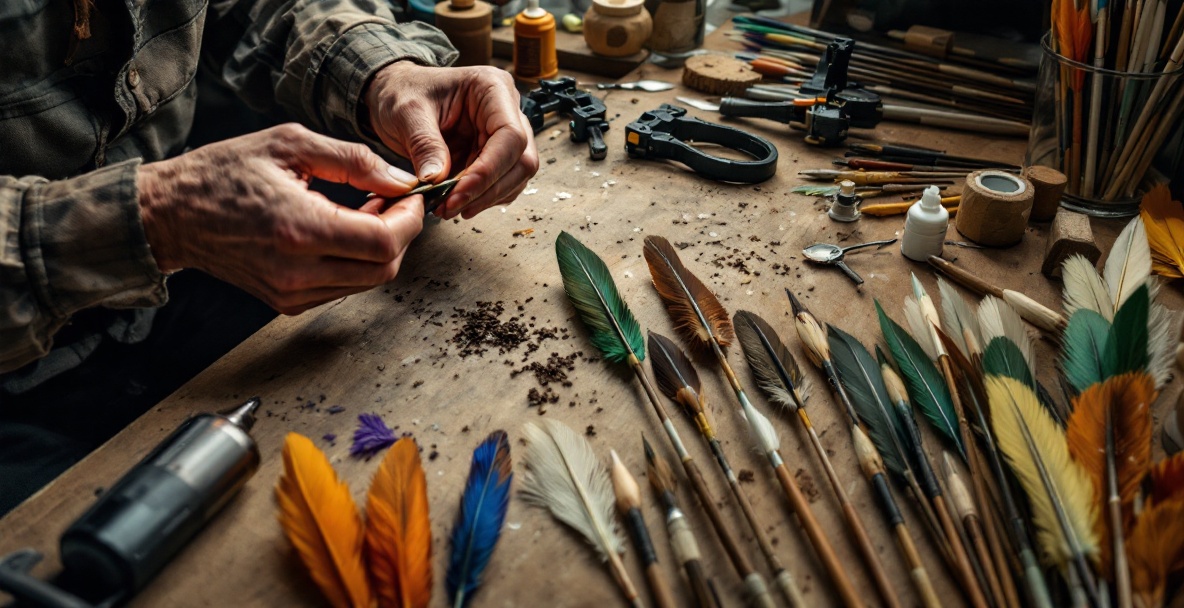
A sturdy fletching jig is the heart of your setup because it keeps your arrow shaft and fletch lined up perfectly as the glue dries. If you are just starting out, use a simple single-fletch jig that lets you focus on one vane at a time. Later, you might explore jigs that handle multiple vanes at once. When it comes to adhesives, the glue you choose is key. Many archers use fast-setting CA glue-often known as super glue-or adhesives made especially for fletching. CA glue dries fast but can be stiff, while fletching glue takes a bit longer to set and gives you more flexibility. Other useful tools are a sharp knife or a pair of fletching scissors, fine-grit sandpaper for smoothing the shafts, rubbing alcohol for cleaning, and cotton swabs to spread the glue. Having a straight edge and pencil for marking, along with a neat and well-lit work area, helps you keep everything on track.
Choosing Your Materials: Shafts, Fletches, and Nocks
Arrow shafts come in materials like aluminum, carbon, wood, or composite blends. Many beginners find aluminum or carbon easier to work with, and carbon stands out for its durability and consistency. Make sure the shaft's diameter and stiffness match your bow's draw weight and length for the best performance. When you pick your fletches, decide between plastic vanes and natural feathers. Plastic vanes are tough and resist the weather well, which is ideal for shooting outdoors. Natural feathers are lighter and suited for traditional bows, though they do not handle moisture as well. Choose based on your style and gear. And for nocks-the parts that link your arrow to the bowstring-select ones that fit the thickness of your string and your release style. Beginners often go with press-fit nocks because they are simple to install and replace.
How to Fletch Your Own Arrows Step by Step
Once your tools are set up and your materials are ready, you can dive into the fun part of fletching. Taking your time during these early attempts will help you build good habits that pay off every time you shoot an arrow.
Getting Your Arrow Shafts Ready
Start by checking your arrow shafts for straightness. Give them a roll on a flat surface; if they wobble, they might need to be fixed or replaced. Clean carbon or aluminum shafts with rubbing alcohol to remove oils, fingerprints, or residues that may stop the glue from sticking. If a shaft has had fletches before, remove any old glue gently with a dull knife or adhesive remover to avoid damage. Then, lightly rough up the area where your fletches will be placed using fine sandpaper (400-600 grit) so the glue can grip better. Finally, mark the spots where the fletches will go. Typically, arrows have fletches spaced either 120 degrees apart for a three-fletch setup or 90 degrees if using four. Even if your jig has guides, marking your shafts ensures consistency across your arrows.
Getting the Fletches in Place the Right Way
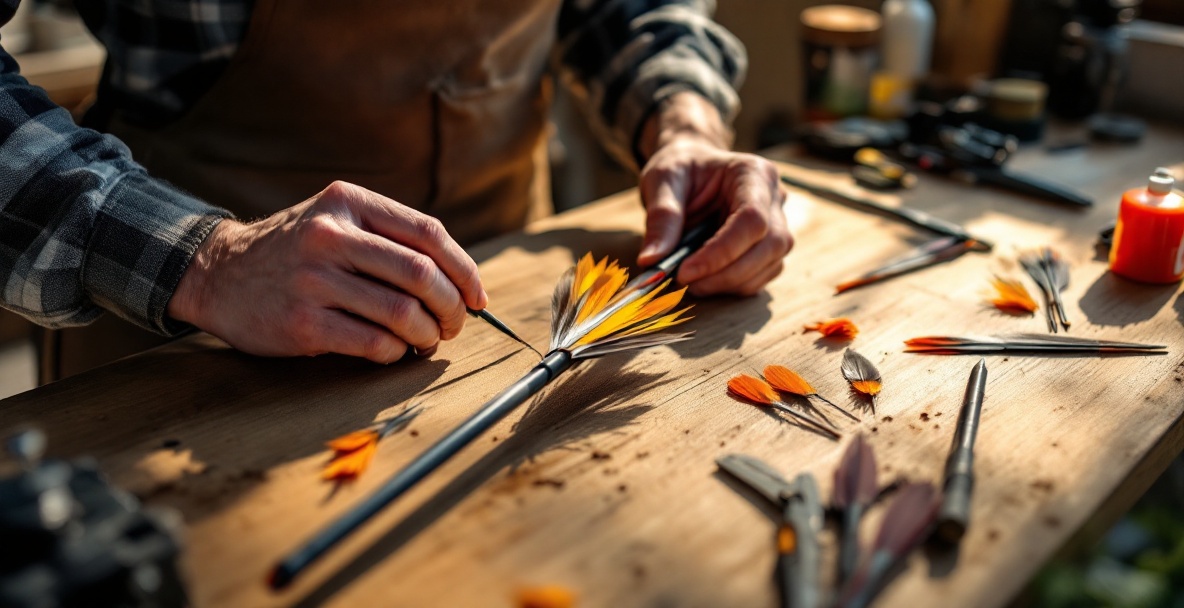
Before you start, take a minute to get familiar with your jig's adjustments. A good jig lets you set the fletch position relative to the shaft and control how much it curves. For beginners, a small offset of 1-2 degrees is great for stability without slowing your arrow too much. Once your shaft is secure in the jig, follow the instructions to keep it from rotating. If your arrow already has a nock, use it to keep the orientation steady. Then, position the first fletch so it sits straight in the clamp. Apply a thin, even bead of adhesive along the base of the fletch or on the shaft where it will attach. Be careful not to use too much glue; this helps prevent weight imbalances. Gently close the clamp so the fletch meets the shaft firmly and let it set for the time recommended on your adhesive, usually anywhere from 30 seconds to a few minutes. After the first fletch is secure, rotate the jig and repeat until all fletches are on. Consistency here is key to ensuring every arrow flies true. Allow your work to cure completely before handling again, which often takes about 24 hours for full strength.
Finishing Up: Setting the Nocks and Adding Your Personal Touch
If you haven't added the nocks yet, now is the perfect time. For press-fit nocks, place a small dab of nock adhesive inside the end of the shaft and press the nock in place firmly, making sure it lines up nicely with your fletches. The cock feather should be positioned so that it stands at a right angle to the bowstring. This is also your chance to add some flair. Some archers mark their arrows with unique designs or colors so they stand out in the quiver. Others add a decorative wrap beneath the fletches or a touch of bright paint to make the arrow easier to see in flight. Hunters might incorporate weight tubes or brass inserts to shift the balance forward for better penetration and accuracy. These upgrades work together with precision-calibrated stabilizers to create a system that feels just right for you.
Common Hiccups in Fletching and How to Fix Them
Even the most experienced fletchers run into issues now and then. Recognizing the problems and knowing how to fix them can save you time and keep your progress smooth.
Fixing Alignment or Glue Issues
If you notice your fletches coming loose when you shoot, take a deep breath. Check whether they fall off immediately or only after a few shots. If they detach right away, your glue might not have dried long enough or could be the wrong type for your materials. In humid weather, give the adhesive a bit more time to cure. If the fletches start shedding after several shots, look closely at where they break. A clean break at the base might mean the shaft wasn't cleaned well enough, so try cleaning and lightly sanding it again. If the fletch material itself tears, it may be rubbing against part of your bow; a slight adjustment in your setup might be needed.
Keep Practicing and Fine-Tuning Your Technique
As with any craft, your fletching skills improve with practice and careful observation. Keeping a small journal of what works best for your arrows can be a big help as you fine-tune your technique. Experiment with various fletch sizes and arrangements once you get comfortable with the basics. Smaller fletches can reduce drag and boost speed, but they might not stabilize as well. Larger fletches offer extra correction for off-center releases, although they may slow your arrow down a bit. Experimenting with these options is part of the fun and will help you find the best balance for your shooting style. Also, consider the conditions in which you usually shoot. For rainy days, water-resistant vanes and adhesives work best while controlled, indoor settings might call for a focus on consistency. This thoughtful tweaking makes sure your arrows are perfectly suited to you.
Final Thoughts: Own Your Craft and Aim High
Making your own arrows transforms a simple archery component into a personalized craft that reflects your unique style. The process not only improves the performance and cost-effectiveness of your gear but also deepens your connection with the sport. Every time you fletch an arrow, you learn a little more about achieving the perfect arrow flight and how all the parts of your system work together.
Ready to boost your game with hand-crafted arrows paired with professional-grade equipment? Visit OneX Archery today to check out our precision-engineered stabilizer weights that work perfectly with your custom arrows, giving you a setup engineered for top-notch accuracy and performance.
Leave a Reply